
Skill level: beginner
Fun level: very

*****
I've been making bean bags since...well...for a long time - and lately I've been seeing a lot of them during my morning blog surfs. I had some scraps left over from a recent project (I'll show you in a couple of weeks) and decided to put together a few Valentine bean bags. While I was at it, I thought I'd throw in a little tutorial.
♥
Materials needed:
- 2 squares of fabric (mine are 6"x 6")
- fabric scraps for applique
- fusible webbing (fabric iron-on stuff)
- filler (I used plastic pellets because one of these is going to my toddler nephew and I want it to be washable, but you can also use rice or beans)
*****
Here we go:
Iron the fusible webbing to the back of a scrap of fabric. This will be your cut-out applique.
Trace your template and cut it out. (I used a heart shape that I created in Microsoft Word by turning on the drawing tool bar and making a heart. There are all kinds of shapes in there; stars, arrows, voice bubbles, etc.)
Peel off the back and iron it on to your top square.

Stitch around your applique shape to secure edges. I like to use a wide zig-zag stitch. 
Pin squares right sides together, stitch around the square leaving a 3" opening (Trust me, leave a large opening! It's easier to fill this way.)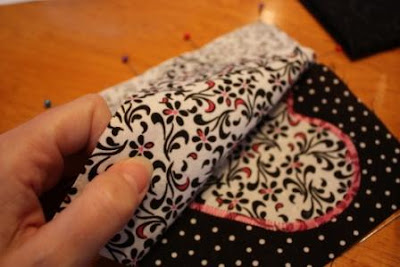

Trim the corners so that when it's turned right-side out your corners will be pretty! (I use a chopstick to poke into the corners once I've turned it to make them look good.) 
Turn. Press. Stitch 1/8" from the edge (don't stitch over your hole for the filling!).
Fill it with plastic pellets, rice, or beans. (I roll up a piece of paper and place it into the hole to make a funnel. For the 6"x 6" square I used 1 cup (8 oz.) of filler.)
Stitch the opening closed.
 Easy, huh?


 Not my finest hour...providing a place for Whiskers to hide while we wait to be seen by the doctor:
 Hubby and Daughter would tell you that I tend to worry a little too much at times. And while it might seem that I jumped on the worry wagon too quickly where Whiskers is concerned, there's a reason I went there so fast.


 I work in a chiropractic office and we have some interesting (and wonderful) patients. One of our patients is a man by the name of Perry. Now, Perry has a few pet peeves. One of those peeves is about the "poor nutritional value in the foods that we consume...and who's to blame? Our government."
 Fast forward 6 months....


 It's been about 11 years now, Carrie is out on her own, and I still pull this recipe card out when I want to make these cookies. I figure I'll have to give this card up when she realizes she needs it and I still have it. :o}
 Mmmm-hmmm...pretty darn good...

 (Photo is of Daughter & me when she was about 3 years old)

